Create IAM User
IAM user for ixmage to read images from your bucketsWe will be creating a new AWS IAM user and look at two ways it can be set up to allow reading objects from non-public buckets.
Create the user in IAM
Navigate to the IAM service screen in your AWS account’s console and click on the option Add users.

Next screen:

| field | value | information |
|---|---|---|
| User name | ixmage-s3read |
We name the user with its purpose. |
| Access Type | Access key - Programmatic access |
Turn on this option. |
| Access Type | Password |
This is not required. |
Click Next
Allow Read access to all buckets
At this point in the creation of the user, we need to decide the permissions the user will have. We will first see the settings to allow the user to read from any of your S3 buckets.
On the next section Allow Read access to a specific bucket we will look at how to configure read access to only a specific bucket, and a specific folder.
| field | value | information |
|---|---|---|
| Set permissions | Attach existing policies directly |
Select from pre-defined AWS policies. |
| Filter policies | s3 |
Type in s3 to filter the policy list so we can find the one we want. |
| Pick | AmazonS3ReadOnlyAccess |
Select this policy. This will allow the user to read from any of your buckets. |

Using this approach, the IAM user (identified by using their API credentials) can be used to set up different aliases pointing to different buckets.
Click Next

You can skip the tags step… Click Next
You can go ahead and click Create user
Success Screen
Here, you have the chance to record your API credentials, which you will use to setup your ixmage alias as an S3 bucket.
If you lose records of your API credentials, head over to section Getting new API credentials to see how to generate a new set.
Allow Read access to a specific bucket
For this scenario, we will first create an IAM Policy with these specifics:
- Can only read objects from one bucket
Creating a specific policy
Head over to your AWS console, and go into IAM > Policies
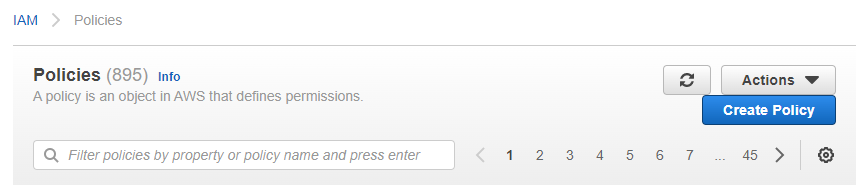
and click on Create Policy
We will switch to the JSON tab

and paste in the following
{
  "Version": "2012-10-17",
  "Statement": [
    {
      "Sid": "specBucketPolicy0",
      "Effect": "Allow",
      "Action": "s3:GetObject",
      "Resource": "arn:aws:s3:::YOUR-BUCKET-NAME/*"
    }
  ]
}
There are 2 things to consider when creating this policy:
- Replace
YOUR-BUCKET-NAMEwith the name of your bucket. - the
*at the end of theResourceproperty tells the policy that every object in the bucket is allowed.- If the bucket holds more than just your images, and the images live within a specific folder, you can further limit the policy to only be allowed inside a particular folder within the bucket. As an example, if the folder is called
website-images, you would change the*forwebsite-images/*
- If the bucket holds more than just your images, and the images live within a specific folder, you can further limit the policy to only be allowed inside a particular folder within the bucket. As an example, if the folder is called
After finalizing the policy JSON, click Next: Tags.
You can skip the tags screen and click Next: Review.
Let’s finalize the policy:
| field | value | information |
|---|---|---|
| Name | bucket-specific-bucket-name |
Give the policy a descriptive name. |
| Description | Mention what it allows, and where |
More descriptive details. |

Click Create Policy
Create a user and attach the policy
We will create a new user and attach the policy we just created so the only thing it is allowed is to read from the specific bucket.
Head over to IAM > Users and click Add users
This step is the same as in section Create the user in IAM
| field | value | information |
|---|---|---|
| User name | ixmage-s3read |
We name the user with its purpose. |
| Access Type | Access key - Programmatic access |
Turn on this option. |
| Access Type | Password |
This is not required. |
On step (2), click on Attach existing policies directly

Now we will click on the Filter policies option and select Customer managed. The policy list will show some policies, including the one we created on the previous section.

Let’s select the policy we created and allow the user we are creating to read from the specific bucket.

Let’s go to the next step (Tags) and skip it, in the last step (Review) we can see the user we are about to create, and the policy we are giving it so it can access our images, and nothing else.

Let’s Create user
On the Success screen, record the user’s Access key ID and Secret access key. These are important to finishing setting up your alias as a secured S3 bucket.
The access key and secret are used to setup the alias of type S3 Bucket. Paste the values into the alias setup so that ixmage can connect as the user.
Getting new API credentials
In the event that you need a new set of access key and secret, go to your AWS console, to IAM > Users
Select the ixmage user and look for the Security credentials tab. Once there, click on Create access key.
While the key is listed on the page, the secret is available on the screen, but cannot be viewed afterwards, so you need to record the access key and secret pair to later use them in your alias configuration.